Showing posts with label Gardening. Show all posts

Saturday, July 4, 2020

Exploring Bellingham: Window Hummingbird Feeder


Our condo balcony with a window hummingbird feeder.
In addition to our daily exercise walks, park visits and grocery shopping, Wayne and I are spending a lot of time indoors these days. Probably the same as you.

I miss my garden and visiting critters back home at the float cabin on Powell Lake.

To bring a bit of nature into our living space, I bought a geranium to tend and a hummingbird feeder to watch.


Because our cityfolk condo in Bellingham is on the third floor, I didn't want a hanging feeder that would drip. I researched online and found a model that could sit on a flat surface. I ordered one ffrom Fred Meyer for parking lot pickup. Unfortunately, it wasn't available.

The ant moat with suction cups is on the left, and the feeder insert on the right.

Then I discovered window feeders. The railing around our condo's balcony has a glass insert, so I chose the Juegoal Window Hummingbird Feeder that shipped direct from Amazon.

It's hard to get a closeup with my iPhone through the window.
It comes with an ant moat that attaches to the glass with two suction cups. The feeder lifts out for easy cleaning. I leave it in place to fill to prevent sugar water spills. I haven't needed to fill the ant moat with water, but back home up the lake it was a necessity.

Almost immediately, a hummingbird came to the feeder. Maybe my geranium with bright pink flowers enticed him (or her) all the way up to the third floor.

I've only seen one hummingbird, but he faithfully comes for breakfast, lunch and dinner.

Sitting on the built-in perch enjoying sips of sugar water.

He must be keeping the ready supply of food a secret, unlike what happened back home. Here's a video of a hummingbird feeding frenzy at the float cabin.


Do you have bird feeders? What kinds of birds visit your home?

Sunday, October 21, 2018

Cowboy Candy Pepper Relish


Jalapeño peppers on my plant.
I follow the Safe Canning Recipes Facebook page and have been inspired to try new things. On their blog there are tested recipes, including one for something called Cowboy Candy, sweet pickled jalapeño peppers.

Last year I made traditional Cowboy Candy. Then I read a Facebook post about someone who diced her peppers to make it into a relish. This week I gave it a try with the last of my jalapeño and Anaheim chili crop.


Cowboy Candy Pepper Relish

Ingredients:

3 pounds jalapeño peppers
2 cups 5% cider vinegar
6 cups white granulated sugar
1/2 teaspoon turmeric
1/2 teaspoon celery seed
3 teaspoons granulated garlic
1 teaspoon cayenne pepper

Directions:

You can use any variety of pepper from mild to hot. Since I was using up my crop, I didn't have 3 pounds. The end result was three half pints rather than nine.

The last of my pepper crop ready to be diced.

Using gloves to protect your hands, slice off and discard the stem ends. To make the relish version, dice the peppers.

Use gloves, it really helps.

Bring the vinegar, sugar, turmeric, celery seed, granulated garlic and cayenne pepper to a boil. Reduce heat and simmer for 5 minutes.

Bring syrup to a boil.

Add the diced peppers and simmer for exactly 4 minutes. Use a slotted spoon to transfer peppers to clean, hot jars. Fill to 1/4 inch from the rim.

Bring the syrup back to a full boil. Boil hard for 6 minutes. Ladle the boiling syrup into the jars over the diced peppers. Insert a knife to remove any air pockets. Add more syrup if needed to maintain a 1/4 inch headspace.

Spoon the diced peppers into hot jars and boil the syrup.

Wipe the rims with a damp paper towel and cover with two-piece lids to finger tightness. Process half-pints or pints for 10 minutes in a water bath canner. Begin timing after the water reaches a full boil. After the time has expired, turn off the heat and let the jars rest in the canner for 10 minutes.

Remove jars with canning tongs and let them rest undisturbed for 24 hours on a cooling rack. Then check seals, clean the jars with a damp cloth, remove the rings and label.

Three half pints of Cowboy Candy relish and one jar of sauce.

If you like hot condiments, this is the one for you. If you have extra syrup, you can process that as well. It’s good brushed on BBQ meats.

Have you ever made Cowboy Candy? What do you think about making it like a relish? They say it's easier to serve that way with crackers and cream cheese. I can't wait to try mine after a few weeks of letting the flavours mellow. -- Margy

Sunday, September 16, 2018

Food Security and Becoming a Locavore


The annual Fall Fair celebrates food security.
Food security is more in the news these days, especially in small remote towns like ours. Locavore is a popular word to describe participating in the local food movement.

The Powell River Food Security Project works to ensure that everyone, especially vulnerable people, have access to the foods they need to stay healthy and thrive. To help get the word out about home gardening, they host the annual Edible Garden Tour.

Garden Club members share information at the Fall Fair.
The Powell River Garden Club supports home gardening with monthly meetings to share ideas and listen to guest speakers.

The Powell River Farmer's Market provides local farmers with the means to get products to local consumers. At the end of the growing season they highlight local efforts at their annual Fall Fair. In addition to Saturday and Sunday seasonal markets, there are others in the region, some during winter.

It's difficult for me to get the the farmer's markets. My solution to food security is a kitchen garden at my floating cabin home. Some items produce year round, but my main harvest starts in June and lasts through October.

My floating garden with four raised beds and a solar watering system.

My garden floats on the lake. It has four raised beds that I use for crops like beets, carrots, kale, chard, broccoli, onions, garlic, lettuce, spinach and herbs. It's amazing how much you can produce in 160 square feet.

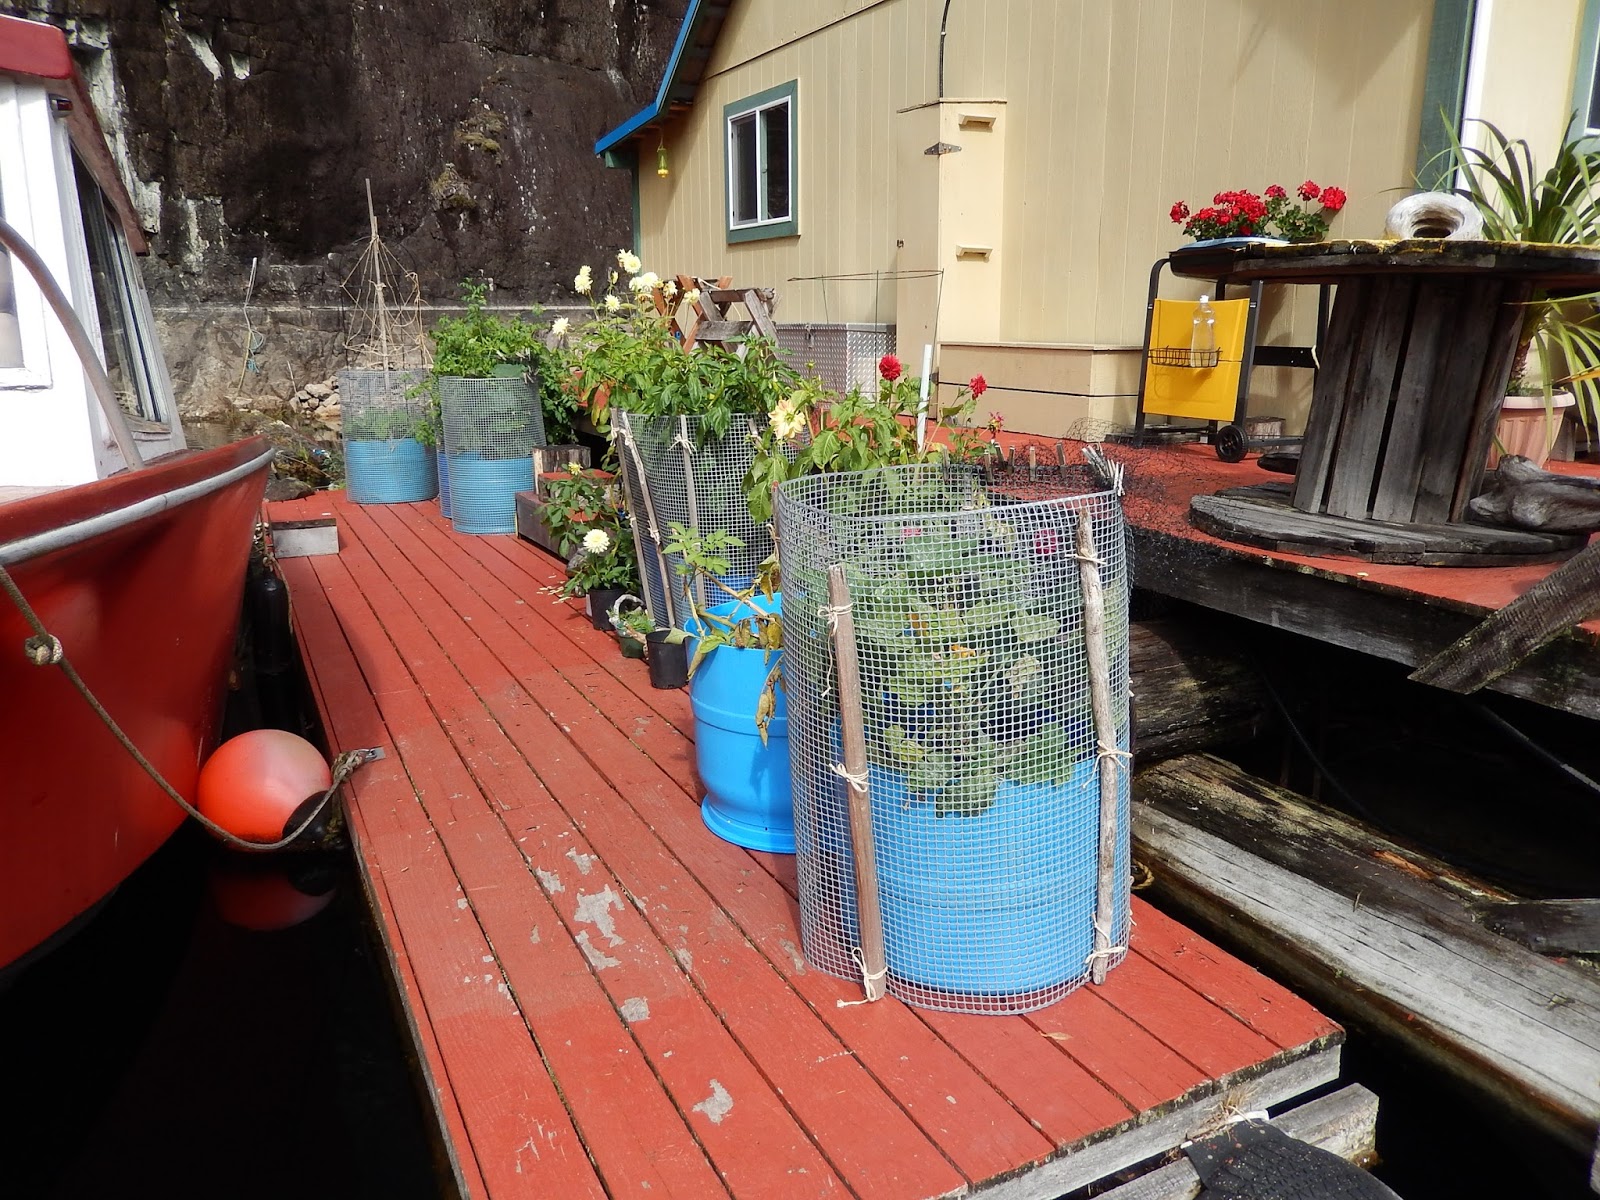
Container gardening in blue barrels.
To increase my growing space I use containers on the decks. 55-gallon plastic barrels cut in half make great growing spaces for plants like blueberries, red currants, rhubarb, tomatoes and potatoes. Smaller containers work well for peppers, eggplant, zucchini, winter squash, beans, peas and more herbs.

August and September have been a time of plenty. We eat most of our produce fresh, thus reducing our dependency on grocery store items.

To preserve some for winter I've canned jam, pickles and relishes. I've hung onions and garlic, dried herbs, stored potatoes and saved seeds. Beets, carrots, broccoli and kale will stay in the garden for winter harvesting. Later I will pressure can the last of my potatoes and carrots.

Fresh carrots and potatoes.
Each year I have one plant that's the best. This year it's my Scarlet Nantes carrots.

I usually get small ones since my float garden has shallow beds. But this year they are huge! The larger ones must be reaching all the way down to the bottom of the bed where it meets the lake water. Maybe that's why they are so large, they have a steady supply of moisture when days are hot.

Does your town have a food security project? How have you become involved? Do you have a kitchen garden?  I'd love to hear about your experiences. -- Margy

Thursday, December 7, 2017

Overwintering Geraniums


When I lived in Southern California, geraniums were perennials. They remained in the garden year after year. Now that I live in Coastal BC with freezing temperatures and frost, they act as annuals when they're outdoor plants.

Covering method.


One year I tried saving my geraniums by mulching and covering them with plastic in their repurposed BBQ planter. It was marginally successful and several roots made it through the winter months to regrow when spring arrived.


Dormancy method.
Another year I tried the dormancy method. The plants were removed, the roots cleaned and the stems cut back before being wrapped in newspaper. After spending the winter in our condo guest bathtub, regeneration was again marginally successful.

Taking the planter indoors isn't an option. We travel during the winter and indoor cabin temperature can drop below freezing.


 Modified Indoor
Overwintering Method

Removing geraniums to transport to the condo in town.
This year I'm trying something new. I call it the modified indoor overwintering method. I removed the plants from their BBQ planters, but left their root balls intact and covered with soil.

I removed dead leaves and remaining flowers. A cardboard box lined with a plastic bag made was a good transfer container to take them to the condo in town. We leave heaters on low during winter, so there's no risk of freezing.

At the Dollar Store I purchased a plastic tub for $4.00. It was just the right size to hold all the geranium plants (a dozen) from my two BBQ planters.

Geraniums in their tub after a month indoors.
I filled the bottom with empty individual-sized plastic water bottles. Then I placed the geranium plants with their soil covered root balls in the tub. In between each plant I placed additional potting mix to help absorb and hold moisture. I placed the tub next to the glass door in the bedroom and leave the blinds open to let sunlight reach the plants.

When we go to town (about once a week) I check the moisture in the soil and add water as needed. I also remove any dead or dying leaves.  The plants have been in the condo for one month now and they are still doing well.

I will give you an update in the spring, but the experiment is worth it. For an investment of $5.00 (one tub and one small bag of potting mix) I'm potentially saving $35 (the cost of 12 plants minus my investment). And I'll have larger plants to start with. Another bonus.

Do you overwinter plants? What are some of the methods you use? -- Margy

Thursday, October 12, 2017

Refrigerator Pickled Peppers


This year I grew a variety of peppers including bell, banana, jalapeno, and Anaheim. I used my jalapeno peppers to make hot salsa and Cowboy Candy (sweet pickled hot peppers). I used a mix of bell, banana and Anaheims in my sweet cucumber pickle relish. Now that my plants have stopped producing, I picked enough to make one jar of refrigerator pickled peppers.

I picked a recipe from the Safe Canning Recipes Facebook page that I follow. It's a great place to learn about canning from experts. Click here to find their pepper recipe linksClick here for the Refrigerator-Pickled Banana Peppers recipe on the "Who Needs a Cape" blog.

Refrigerator Pickled Peppers

Ingredients:

3 cups of vinegar (white or apple cider)
4 medium-sized banana peppers
1/4 cup sugar
1 tbsp. salt
6-10 garlic cloves, peeled
1/2 tsp oregano
1/2 tsp dill (or fresh dill sprigs)
1 tsp black peppercorns (divided)
2 clean jars


Directions:

Wash and prepare peppers. I used a combination of banana peppers and Anaheim chilies (a mild variety).  I found that one medium and seven small peppers would not quite fill a pint jar.

Slice (if desired) and remover seeds (if desired). I chose to cut mine in rings and include most of the seeds. Be sure to wear gloves for spicier peppers. Peel garlic cloves.


Combine vinegar, sugar, salt, oregano, dill and 6 garlic cloves in a medium saucepan. Bring to boil then reduce heat and simmer for 20 minutes.

Raw pack prepared peppers to warm sterilized jars. Add peppercorns and fresh dill, if desired.

Strain brine mixture and discard scraps. I strained and filled my jar in one step. Fill jars with brine to cover the contents.


Cover lightly the jars with canning lids during the cooling process. Once the jars are cool, discard the canning lid and over with a screw-type lid.  Transfer the jars to the refrigerator.


I used a pasta sauce jar and a repurposed plastic lid for my pickles. Since refrigerator pickles don't need to be processed in a water bath, this was a good use for my recycled items.


Let the peppers steep in the brine for at least 24 hours before eating.  The longer they sit, the better they will become. Keep the jars refrigerated so you can enjoy these peppers with salads, sandwiches or as a tangy snack. -- Margy

Saturday, November 26, 2016

Saving Dahlia Tubers in Containers


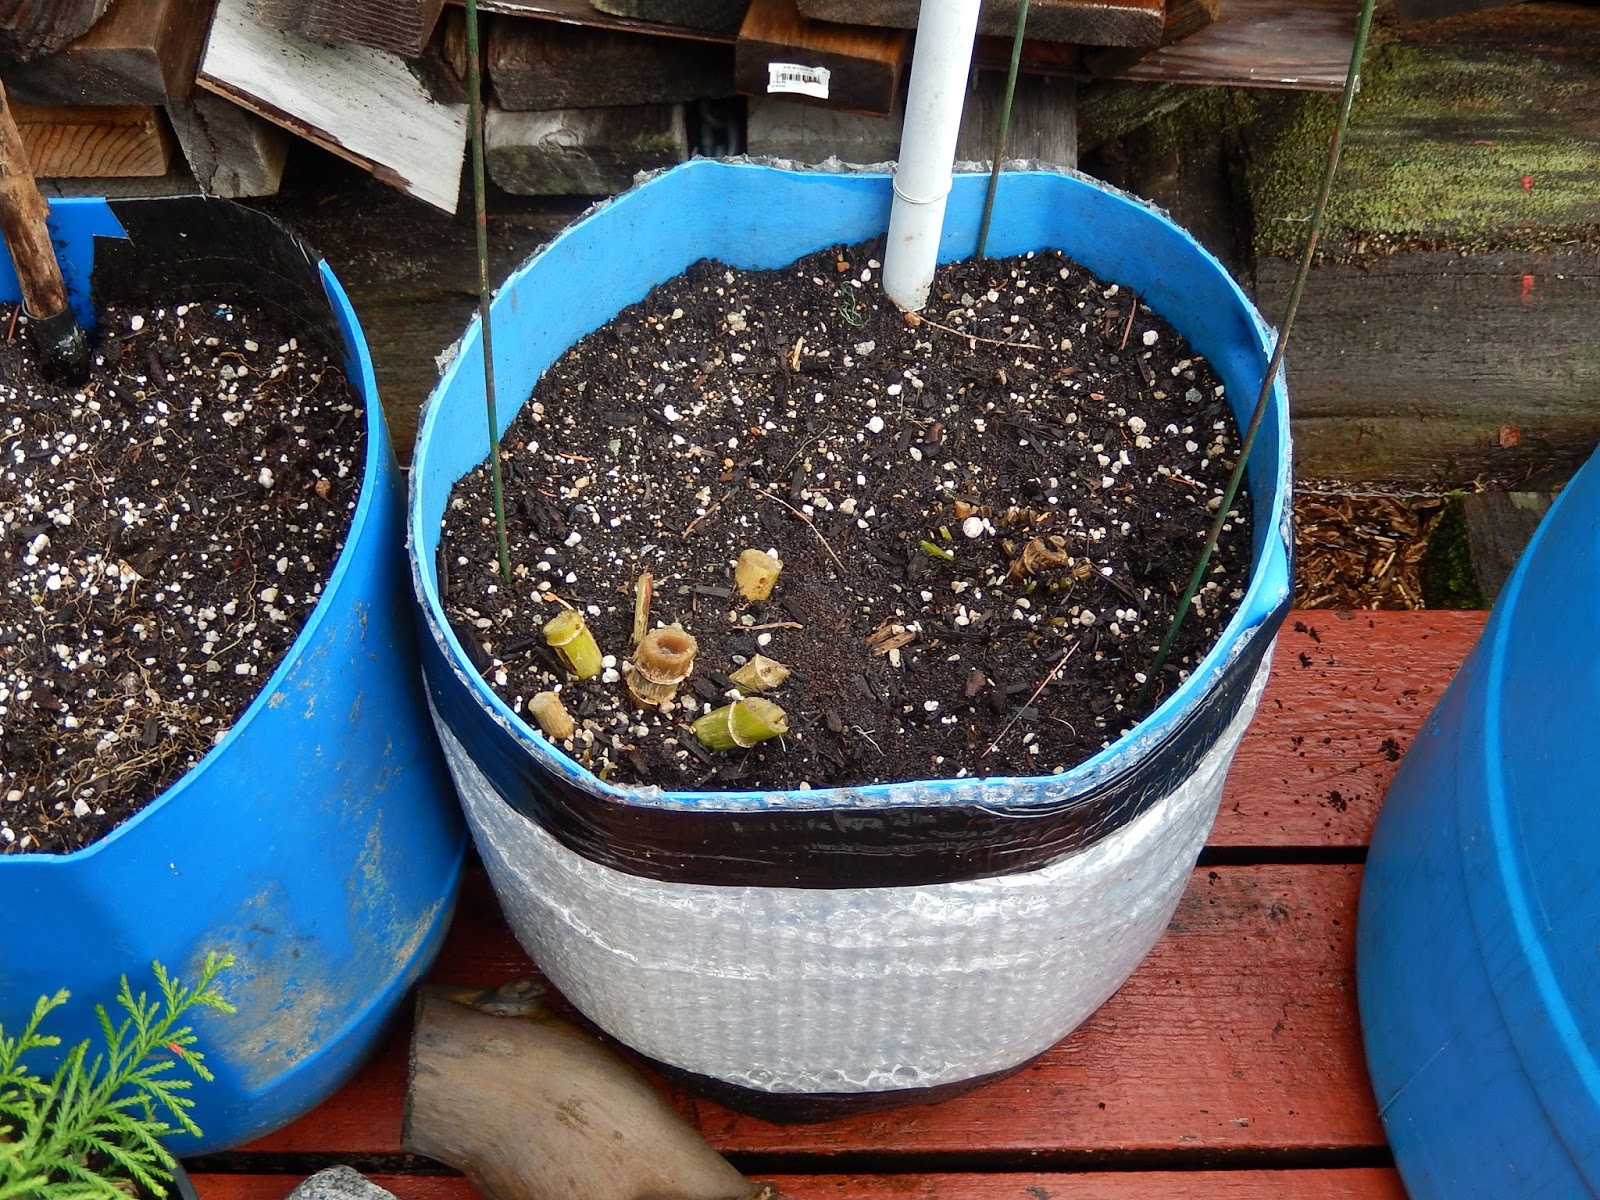
Step 1: Insulate the Dahlia container in bubble wrap.
Two years ago I dug up my dahlia tubers and kept them all winter at the town condo in the guest bathtub.

The tubers were hard to dig, and needed added moisture in their protective sacks ever few weeks. But, most of them did survive for replanting.

Last fall I tried something different. I wrapped my dahlia containers with bubble wrap and covered the soil with a heavy mulch.


In summer, the dahlias gave me lush plants and beautiful flowers. I would call that a huge success with very little effort.

Step 2: Cut the Dahlias back in fall.
This year I decided to repeat the same procedure.

We don't get extreme cold, but do have several stretches of freezing weather.

I left the bubble wrap on the pots, so that step was already done.

Click here to read more about it. Save the small sized bubble wrap from parcel packaging. You'll have a free supply for winterizing projects.


Step 3: Cover the soil with crumpled newspaper.
The air pockets help keep the freezing temperature away from the sides of the pot, much like an insulated water pipe.

When the weather started turning cold and the foliage died, I cut the dahlia plants back to an inch above the soil level.

I crumpled newspaper over the soil to give the tubers an insulation barrier.


Step 4: Cover the newspaper with a piece of cardboard.
Over the top of the newspaper I put a layer of cardboard, and topped it off with soil to keep everything in place on windy days.

I don't have a place to bring the containers indoors at the cabin where temperatures won't get below freezing sometime during the winter.

This has been a good alternative for me, and I've successfully winterized my rhubarb the same way since 2010.


Step 5: Cover the cardboard with soil to hold everything in place.

Have you ever kept dahlias outdoors through the winter? Do you get freezing nights? Was it successful for you? -- Margy

Thursday, November 17, 2016

Patio Baby Eggplant Parmesan Bites


Patio Baby eggplants are about the size of a real egg.
I purchased a Patio Baby Eggplant seedling without really knowing what it was. I wanted a smaller eggplant, and that’s what I got.

The Patio Baby Eggplant was developed for pots and small gardens. It grows into a slender bush about a foot and a half tall.

Mine didn’t start producing fruits until late summer. The plant information says it will continue until the first frost.


Cut, dip, dredge and fry.
The small fruits fit in your hand. In fact, several will. I decided to make individual Eggplant Parmesan Bites due to their diminutive size.

I cut each eggplant into three slices lengthwise.

I beat one egg with milk and prepared a coating out of equal parts flour and cornmeal seasoned to taste with sea salt.


Fry until lightly browned.
Each slice went into the egg mixture, dredged in the cornmeal and flour mixture, back to the egg and finally back to the flour mixture again.

Fry the coated eggplant in olive oil using medium-high heat until they become soft inside and the coating becomes lightly browned. Drain on a paper towel until they are all done.

Arrange the little bites on a baking sheet liberally coated with cooking spray.

Assemble the bites with sauce and cheese.
Top each eggplant bite with a dollop of prepared spaghetti sauce (commercial or homemade), a shake of Parmesan cheese, and a small slice of mozzarella cheese.

Bake the bites at 350°F until  the cheese on top is melted and bubbly.

I served my Eggplant Parmesan Bites as a dinner entree with salad.

The cheese is melted and they are ready to enjoy.

My Patio Baby plant produced enough little eggplants to make this recipe three time over the summer and fall. If you live in a warmer climate, you might even get more for a longer time.

Do you have any favourite eggplant recipes that you would like to share? -- Margy

Wednesday, October 19, 2016

Something from Nothing:
Inexpensive Large Planter Pots


Life slows each fall. Bears store up fat for a long winter's sleep and plants bear seeds for the coming spring. As nutrients are stored in roots and stems, leaves change colour and drop, a sign they too are ready for a rest.

My blueberry bushes need larger pots for the coming spring.

Transplanting time comes during the dormancy period from late October to early spring. I have two blueberry bushes I want to transplant. To be ready, I needed larger containers.

Blue 45 and 55 gallon blue barrels used for vegetable gardening.

Large pots are expensive. Because I live in a floating cabin, weight is also a problem. Heavy items make the floating foundation sink and sunken cedar logs get waterlogged. Anything to minimize weight is a positive.

Step 1: Cut the barrel in half with a grinder or skill saw.

So, how could I reduce cost and weight at the same time? The answer was blue barrels. They have become my go-to for vegetable gardening pots for years. But this time I wanted something more decorative.

Step 2: Drill plenty of drain holes.

The tops of the barrels have a pleasing sculptured rim. You don't want to cut up good barrels, they cost  $25-$45 each. But damaged ones can be found for free floating around the lake after winter storms.

Step 3: Clean the barrel and rub off any rough edges.

Picking one up is good for the environment, and a way to make something new and inexpensive from "nothing." That's recycling at its best.

Step 4: Spray paint the barrel in a desired colour.

Going from a "nothing" barrel to a large planter pot takes a few easy steps. The hardest part is cutting it in half. You do need power tools for this step. We've used either a skill saw or a grinder. For my decorative pots, I picked two barrel tops with decorative rims and bands. The remaining bottoms became blue vegetable garden planters.

Step 5: A large decorative planter to match the cabin's hunter green trim.

I picked Krylon Paint and Primer in hunter green to match the trim on our cabin. The can advertised that no primer was needed, even for plastic. After my first coat there were a few chips so I gave them a second coat on the outside. Maybe if I had used primer first that wouldn't have been needed. Getting paint to stick to plastic can be difficult.

My pot-bound Dracaena plants will receive the old pots.

Now I have two beautiful pots for my blueberry plants for less than $10 in spray paint. The barrels and labour were free (unless you count sweet-talking Wayne into the project). And in the spirit of letting nothing go to waste, the old blueberry pots will be inherited by my two rapidly growing Dracaena plants. They are popping out of their old containers and ready for new homes.

Do you have any tips for getting free or inexpensive large garden pots? I'd love to hear about what you use. -- Margy

Thursday, August 11, 2016

My Dracaena Spike Plant Blooms


Repurposed BBQ planter.
Back in 2010, I repurposed an old BBQ into a planter. I put it right under my kitchen window at the cabin to give the side of our home a bright focal point.

I annually plant flowers in it, but wanted something to give a higher green background. I picked out two small grass-like leaved plants at Canadian Tire for that purpose.

Over the years, those spiky little plants (you can barely see them in the picture at the left) grew until their roots took over the whole planter. Consequently, in 2015 I relocated them to deck pots of their own.


I went back to Canadian Tire to talk to the nursery expert. She wasn't sure what I had, but thought it might be a plant called Dracaena. I looked it up online and that made sense. I believe mine is a Dracaena indivisa also known as a Spike Plant. It's commonly used in planters and gardens to provide height and interest.


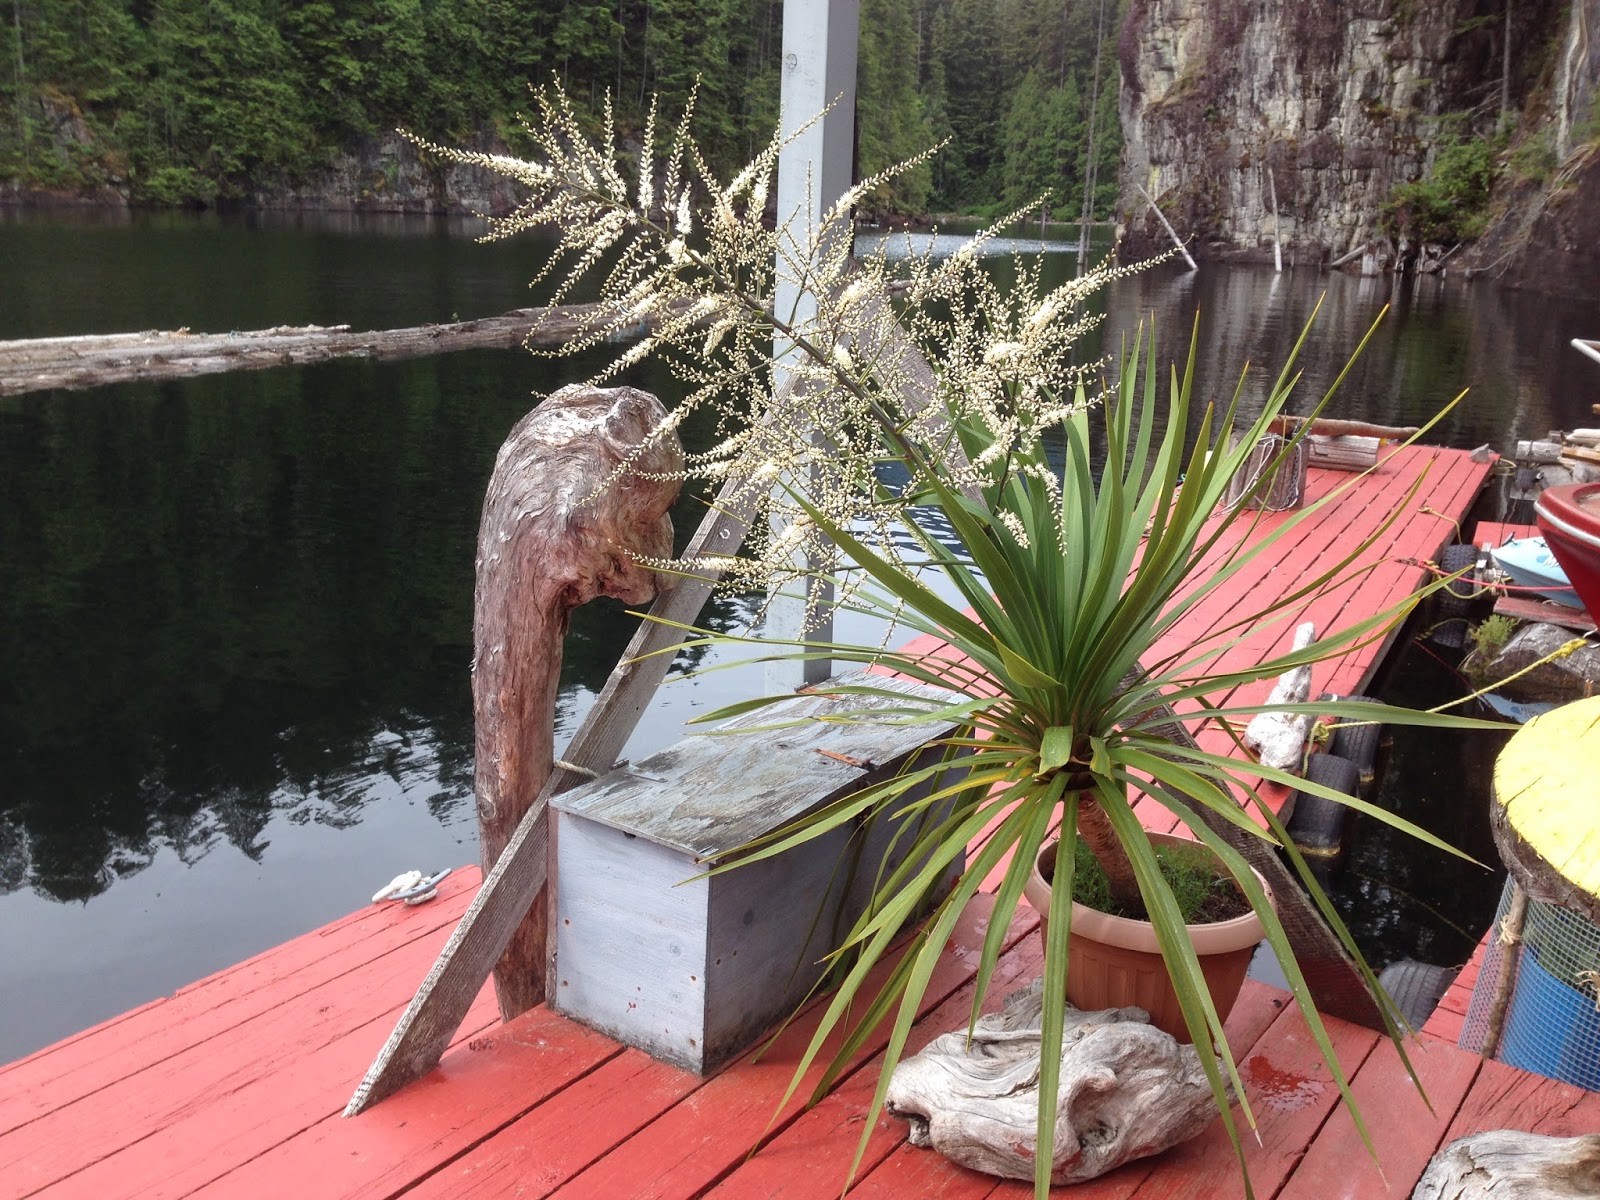
Then this year I was surprised to see one of the plants develop a spike. That spike grew larger and finally opened to a massive bloom.


Not only was it beautiful, it was very fragrant, and provided the bees with an early spring source of nourishment.


Now my Dracaena has created two separate branches from where the bloom was removed. I understand that this well happen each time a bloom occurs. I guess I better look for some bigger pots! -- Margy