Saturday, May 30, 2020

Exploring Bellingham: Northern Flicker


An American Flicker sitting on a dead tree in Bellingham.
We chose our condo because of the view from our bedroom and living room windows out to the protected riparian zone along a small creek.

We're on the north side of downtown Bellingham. While it's a busy area (in normal times) next to Bellis Fair Mall, there are many parks, protected areas and large undeveloped lots nearby.

The riparian zone is home to many types of birds. I've already introduced you to the Pileated Woodpecker. Another is the Northern Flicker.

Northern Flickers are also in the woodpecker family. They are large brown birds with distinctive markings like a dark bib around the neck. I believe this is a female because she is missing red whiskers. Unlike the Pileated Woodpecker who drills for food, Flickers feed along the ground looking for ants, beetles and grubs. They'll also eat fruits and berries foraged from branches.

Flickers like to frequent the dead trees in the natural area behind our condo.

They drill to communicate and make a nest hole if an empty one isn't available. Here's a story about an encounter Wayne and I had with a Northern Flicker up the lake at our float cabin.

Flicker nesting deterrents and lots of yelling finally worked.
Several years ago, a Flicker started drilling a nest hole in our cabin's wall. John’s mother, Helen, suggested painting large yellow and black owl eyes. It had worked during a woodpecker invasion at our friend John's Cabin #1.

Two aluminum pans and paints created scary owls. Wayne nailed boards over the hole and installed the guard owls. It took several days to chase the Flicker away to choose another nest site, hopefully not someone else's cabin.

What kinds of birds frequent your corner of the world? Do you have any funny (or scary) stories to tell about them? -- Margy

References: The Cornell Lab: All About Birds and The Audubon Field Guide (online)

Wednesday, May 27, 2020

Quarantine Cuisine: Apple and Berry Crisp with Oat Topping


Adding apples to my berry for a big crisp.
My cooking right now includes desserts to finish our meals with a sweet touch.

My weekly grocery pickup from Fred Meyer always includes berries. If needed, freeze any uneaten ones before shopping again. Today I thawed my stash to make a crisp.

I wanted to refresh my memory about oatmeal topping. I chose Apple Crisp with Oat Topping by realnakedchef on Allrecipes.


Apple and Berry Crisp 
with Oat Topping

Fruits mixed right in the baking dish.
My Fruit Ingredients:

6 scant of cups berries (I had strawberries, raspberries, blueberries and leftover cranberry sauce)
3 medium peeled and sliced apples
4 tablespoons white sugar
3 tablespoons flour
1 teaspoon ground cinnamon


Lots of tasty topping!
Oat Topping Ingredients:
This is a half recipe for my 9" X 9" baking dish.

1/2 cup brown sugar
1/2 cup quick minute oats (I like extra oats)
1/3 cup all-purpose flour
1/3 cup sliced pecans (optional)
1 teaspoon ground cinnamon
1/4 cup room temperature butter or margarine

Directions:

Coat a medium-sized baking dish with vegetable spray. To make it easy, use the baking dish as a mixing bowl. Mix together the berries and sliced apples. Sprinkle white sugar, flour (to thicken the juices while baking) and cinnamon over the top and stir until well blended.

Use a bowl to mix the brown sugar, oats, flour, sliced pecans and cinnamon for the topping. Use a pastry cutter or whisk (my choice) to cut the butter into the oats mixture until it resembles pea-sized crumbs.

Double duty in the oven warming frozen lasagna from last week for dinner.

Spread the topping over the fruit. Pat it gently until even.  Bake at 350 degrees F for about 40 minutes or until it's golden brown and the sides are bubbling. If you used apples, it may take a little longer for them to soften.

A scoop of rich vanilla ice cream made our sweet treat hit the spot!

If you have lots of berries, you can cut down on the apples or eliminate them altogether. Fresh or thawed berries work equally well.  Crisps are very versatile.

What's cooking in your kitchen right now? -- Margy

Sunday, May 24, 2020

Exploring Bellingham: Cottonwood Trees


Tall bare Cottonwood trees in late winter.
This spring I've had the chance to follow the development of plants from their winter bare to their spring bloom. It's been a nice diversion during our isolated life.

Behind our Bellingham condo there are a variety of trees. The largest is the Cottonwood. In fact, the neighbourhood is full of them.

Cottonwoods are a type of poplar, with the same quivering leaves. They grow in moist areas, so the wetlands behind us is a prime spot.

Female catkins on high branches.
Our variety in the Pacific Northwest is the Black Cottonwood.

Male and female flowers are in separate catkins (long, slim clusters) that appear before the leaves each spring.

The female catkin produces the cottony seeds that are blown long distances. It's these fluffy white masses that give the tree its name.


Day one of the seed "explosion."
For weeks now the large green leaves and catkins have been maturing.  A unique fact is that Cottonwood trees are dioecious. This means the male and female flowers develop on separate trees. Growing in large groves increases the chance of fertilization.

Sorry, my closeups aren't the best. I left my camera in the RV in Arizona. We'd planned to return by late March, but that never happened. All I have now is my iPhone's camera.


A grove of Cottonwood trees in an undeveloped area near the Bellis Fair Mall.

For a week now in Bellingham, there have been puffy white seeds floating everywhere from the Cottonwood trees. Here's a short video showing how they fly through the air creating a plant version of a snow storm.


A tall Cottonwood on our walking route.
The seeds are very small (1X4 mm) which is remarkable considering they can grow into one of the largest trees in North America, up to 100 feet (30+ metres) high.

Not only are Cottonwoods large, but fast growing, reaching maturity in 10-30 years. Young trees can add an amazing six feet per year.

Historically, their trunks were used by Native Americans to make dugout canoes. As a commercial product, their course wood is best suited for making pulpwood in the paper industry, pallets and shipping crates.

As summer changes to fall, the leaves turn bright yellow and orange, making a warm contrast to the cooling blue skies.

Here's a look at my Cottonwood trees through the seasons.

Cottonwood trees through the seasons: winter, spring, summer and fall.

What kinds of trees are common where you live? -- Margy

Thursday, May 21, 2020

Quarantine Cuisine: Crockpot Magic Meatloaf


My well loved cookbook.
Making so many meals at home right now, a crockpot comes in handy.  My Rival was a wedding present in 1971. I used it a lot while teaching in Bellflower. It's followed me through the years and now serves me well in our Powell River condo. It's such a classic that one is on exhibit in the Smithsonian.

The next Christmas I bought one for Mom. Now it's here in the Bellingham condo that used to be hers. With it I can continue to make some of my favourite recipes.

We love meatloaf and the crockpot makes it an easy meal to prepare. And it brings back wonderful memories of cooking here in the condo with Mom.


CROCKPOT MAGIC MEATLOAF
"( . . . it cooks while you loaf!)"
(Page 26 of the 1971 Rival Crockpot Cookbook)

Mom always added a touch of love.
Ingredients from the Cookbook:

1 1/2 pounds ground beef
1 egg beaten
1/4 cup milk
1 1/2 teaspoon salt
2 slices bread crumbed
1/2 small onion chopped
2 tablespoons green pepper chopped
2 tablespoons celery chopped
Ketchup topping


Mix the ingredients.
Changes I Made:

I omitted the green pepper
I used 1 stalk of celery with leaves chopped
1/2 teaspoon poultry seasoning
Garlic powder to taste
Ground black pepper to taste

To have leftovers for another meal, and a meal in the freezer, I doubled the recipe.


In the crockpot ready to cook.
Directions:

Coat the crockpot with vegetable oil spray.

Let bread dry overnight or in a warm oven. Break it up by hand into small crumbs. Stir in the chopped vegetables and seasonings.

Beat the egg and milk and pour over the bread crumb mixture to moisten.

Combine with the ground beef. This step is best done with clean, well washed hands.
Form the meat into a rounded loaf and place it in the bottom of the crockpot. Bake on high for one hour and then reduce to low for 6-8 hours. Top with ketchup if desired during the last hour. Check with a meat thermometer until the center reaches 155-160 degrees F.

Resting before slicing.

To complete my meal, I baked two potatoes and cook carrots with broccoli in the microwave. How are handling having more meals at home? Do you have some recipes to share? -- Margy

Saturday, May 16, 2020

Exploring Bellingham: Pileated Woodpecker


Dead trees provide homes, nesting places and food for birds.
We're "staying home" at our condo in the States. Mom moved here from California in 2005 to be closer to us. Now it's ours. While it isn't as close to nature as our cabin, we have the creek behind our building with trees and bushes for birds. 

I was on the sofa and heard a strange sound. I saw small objects flying through the air and traced them back to a Pileated Woodpecker drilling into a dead tree. The more he pecked, the more the wood chips flew.

I knew it was a Pileated Woodpecker by its large size, black colouring and distinctive red topknot. They're common in our area, but it's the first I've seen.

The woodpecker was drilling for his dinner, not making a nest hole.

After he worked for a while, he stuck his head inside a nearby hole. He obviously was gobbling up some ants or insects he had dislodged and sent scurrying into his makeshift bowl. Yum!

Eating the "fruits" of his labour.

This was a good example of how you can find nature in your own backyard. Go see what you can find in yours. If you have children, it makes a wonderful learning experience. I have so many fond memories of exploring nature with Mom and Dad. I remember many of the things I learned to this day and it's probably why I love float cabin living so much. -- Margy

Thursday, May 14, 2020

Quarantine Cuisine: Baked Lasagna


A large lasagna gives us one fresh and three frozen meals.
Wayne and I are still in self-isolation in our Bellingham condo, dreaming about our RV and float cabin. I'm not really complaining, we are safe, healthy and comfortable.

My parents were educators. Dad was an assistant principal and Mom taught first grade. They left early and stayed late. Fixing weekday dinners from scratch was difficult. That's why they cooked on weekends and froze leftovers. I'm using their strategy now to increase variety and reduce cooking chores.

Fixing a large lasagna fit the criteria. I started by making a batch of Daddy's Special Sauce. Like Daddy taught me, I use a "dump and pour" method. Here's what I did. If you want a more trusted recipe try The Best Lasagna Recipe at Simply Recipes.

Baked Lasagna

Ingredients:

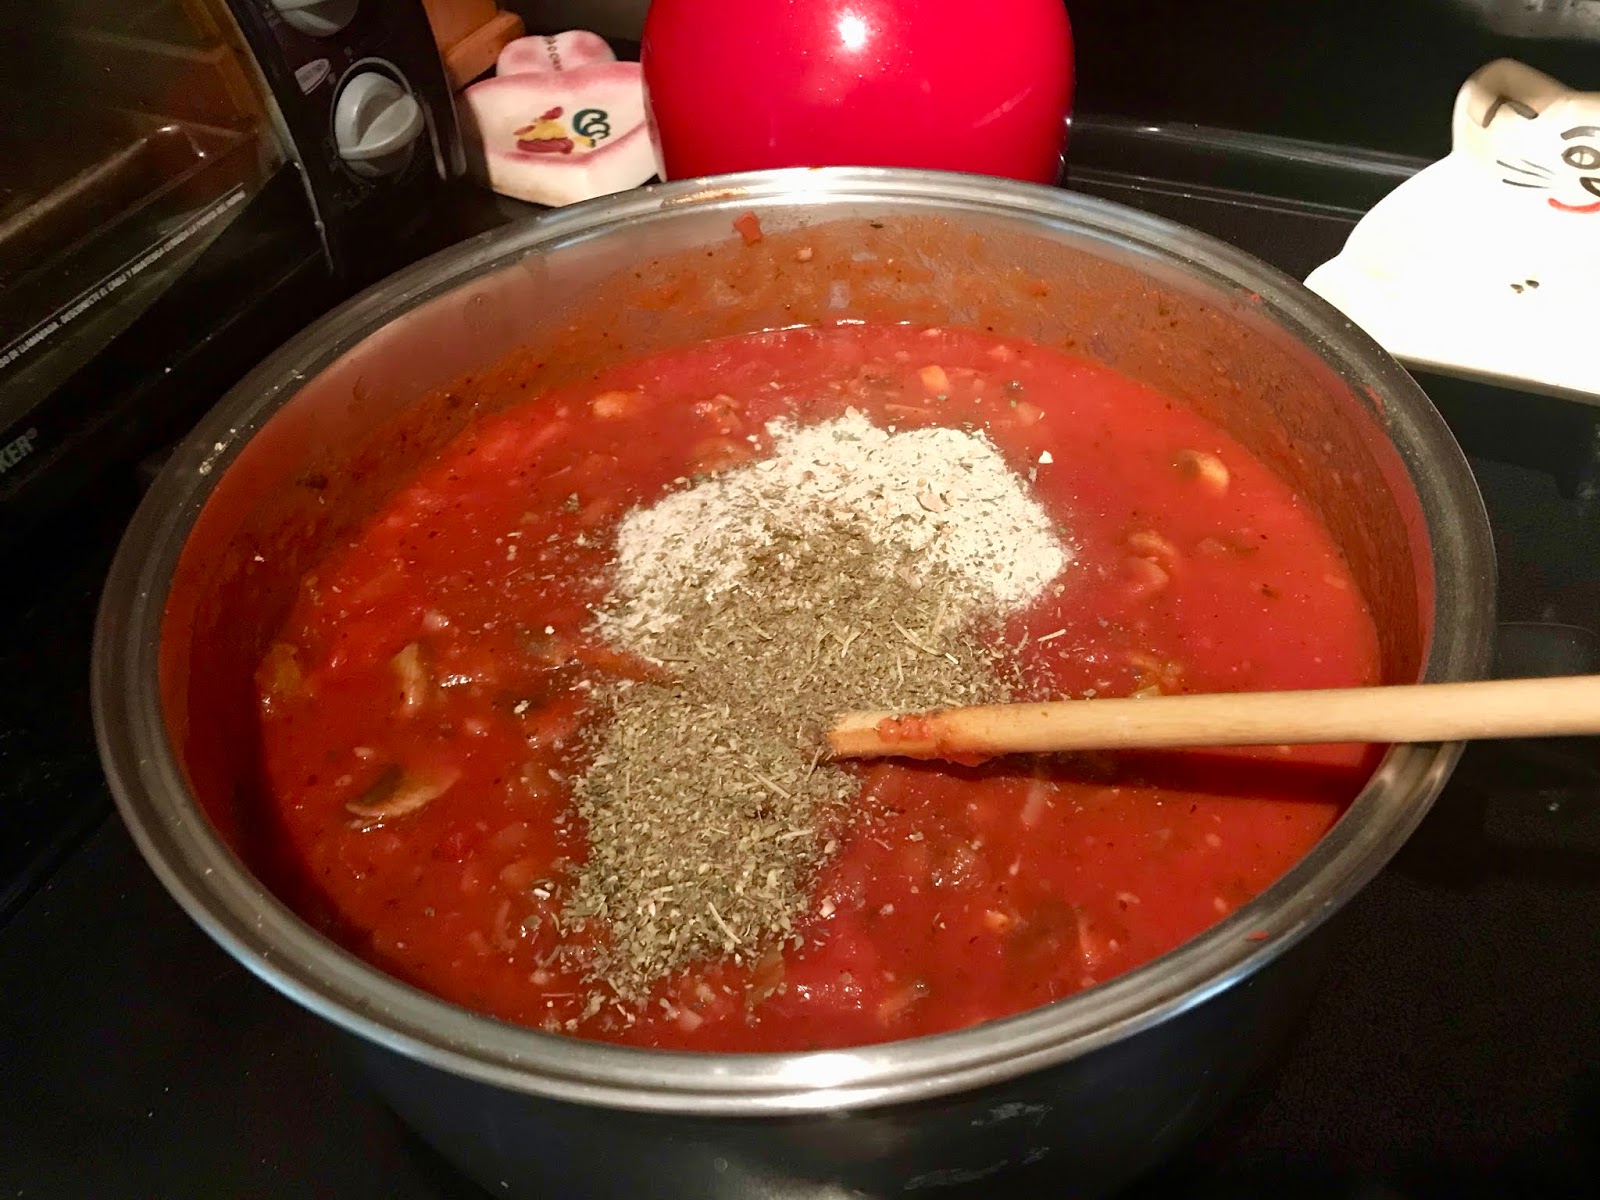
Assembling the sauce, I like lots of extra spices.
Daddy's Special Sauce
1 24-oz jar spaghetti sauce
1 14.5-oz can diced tomatoes
2 8-oz cans tomato sauce
1 6-oz can tomato paste
1 cup water (more if needed to thin)
1 package spaghetti sauce mix
2 tablespoons Italian herbs crushed
1 teaspoon garlic powder
1 tablespoon olive oil
1 small onion diced
5 cloves garlic minced
2 stalks celery chopped
1 pound mushrooms sliced
1 pound mild ground Italian sausage
1/2 pound ground beef

8 lasagna noodles boiled

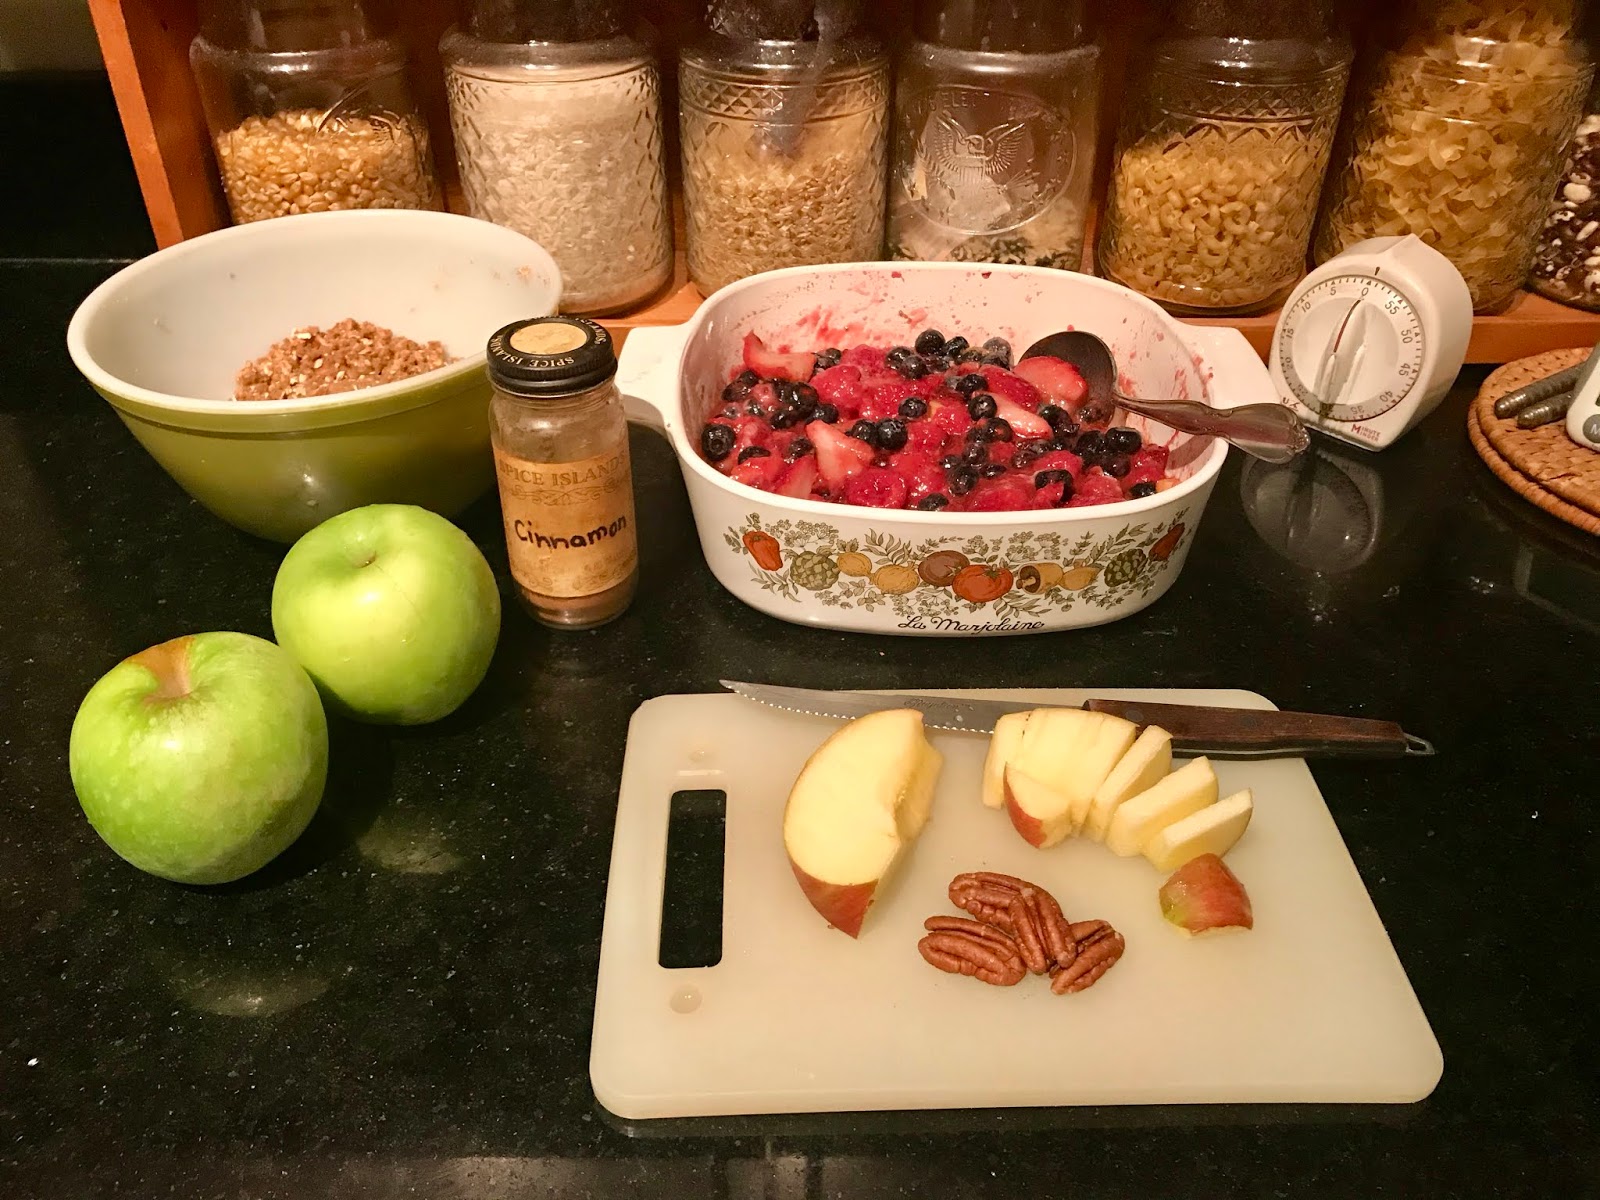
Grate the mozzarella and prepare ricotta mix first.
Cheese Filling:
1 15-oz ricotta cheese
1/2 cup grated Parmesan cheese
1 cup canned or frozen spinach
1/2 teaspoon garlic powder
1 teaspoon Italian herbs crushed

1 16-oz package mozzarella cheese grated

1 extra cup grated mozzarella for topping

Directions:

Prepare the cheeses first. Grate the mozzarella and set aside. Put the ricotta, Parmesan, garlic powder, and Italian herbs in a bowl. Squeeze out liquid from spinach and chop. Add to the bowl, mix everything well and set it aside.

After the sauce is prepared, cook and add the meats.
Start the sauce by mixing spaghetti sauce, tomato sauce, tomato paste, diced tomatoes, water, spaghetti sauce mix, Italian herbs and garlic powder in a large pot and heat on low. I use water to get the last bits of tomato goodness out of the cans and add that to the sauce. As it cooks, you will probably need to add more water to thin the sauce.

In a frying pan a little at a time, saute onion, garlic, celery and mushrooms in olive oil until softened. Add to the sauce.

Crumble Italian sausage into a frying pan. Cook until done, drain and add to the sauce. Do the same with the ground beef. Let sauce simmer to blend flavours.

My assembly line on the stove.
Heat water to boiling in a large pan with a dash of salt and a dollop of oil. I used my frying pan. Boil four whole lasagna noodles until pliable.

Coat a large deep baking dish with cooking spray to reduce sticking. Put in enough sauce to cover the bottom of the dish.

Overlap the four boiled noodles on top of the sauce. Add another layer of sauce on top of the noodles.

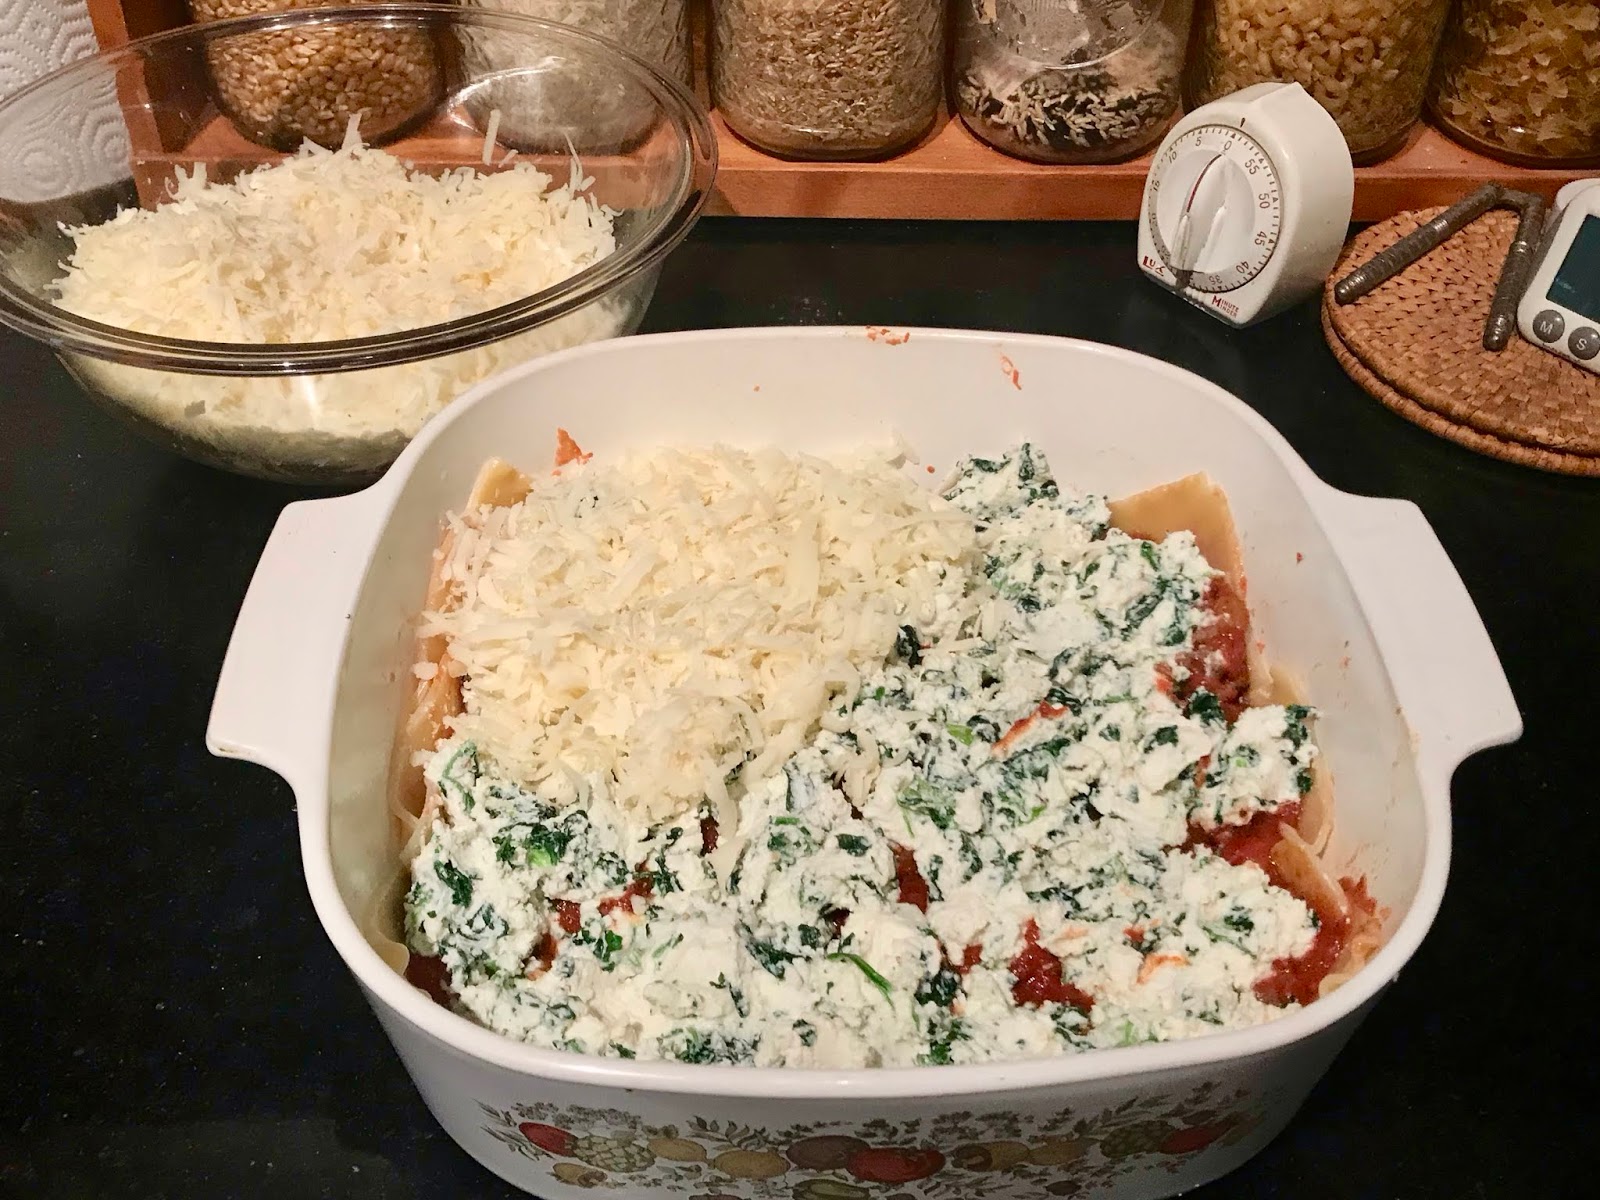
Next add the ricotta cheese mixture followed by the grated mozzarella cheese.

Adding the cheese layers over at the sink.
Boil four more noodles until pliable.

Add another layer of sauce on top of the cheese and overlap the last four noodles on top.

Top the noodles with enough sauce to cover them to prevent drying out.

Bake at 350 degrees F for about an hour or until bubbly around the edges. Add the extra cup of mozzarella cheese on top and continue to heat until it is melted.

Remove from the over and let it sit for 15 minutes before cutting.

Finally sauce, more noodles and more sauce.
If you used my list of ingredients, you will have sauce left over.  I froze mine in meal-size containers for future spaghetti dinners.

This recipe made enough lasagna for the two of us for dinner, three frozen meals and frozen spaghetti sauce for two more meals.

The initial cost for ingredients was high, but when you stretch it out over multiple meals it's more economical. Plus, one day's work resulted in six nights with minimal preparation. Now that's the way to go if you ask me. -- Margy

Sunday, May 10, 2020

Exploring Bellingham: Field Horsetail


Field Horsetail showing it's segmented sections.
Staying in Bellingham through spring has been exciting. We've had our condo for fifteen years, ever since we retired from our education careers in Los Angeles. Yet, we haven't been here for such an extended period during spring.

Our daily walks have let us watch the native plants in natural areas mature. I've photographed a few as they've developed.


Field Horsetail

I took botany in college.  I loved drawing Horsetail in my lab journal. It looked so primitive. That makes sense, it is considered a "living fossil." The genus is over 300 million years old and was prevalent in Paleozoic forests. Some varieties grew to 30 metres tall.

Horsetail emerges in spring from underground rhizomes.
Field Horsetail (Equisetum arvense) grows in moist spots along streams, sandy places, disturbed or open areas and shady forests. It's considered a weed when located in agricultural and landscaped areas, and it can be poisonous if grazing animals eat it in large quantities.

Their deep, interconnected rhizomes (root structure) make them difficult to eradicate.  But in natural settings, they provide a bright green, wispy ground cover.


The thick fertile stems emerge first.
The perennial underground rhizome sends up both fertile and non-fertile stems in spring.

The pale, thick fertile stems poke up first. They have a cone-like, spore-producing structure on top of a non-branching stem. Horsetails reproduce using spores, not seeds.

Non-fertile green stems emerge shortly thereafter. As they continue to grow, the fertile stems die back and disappear under the new bright green growth.


The green non-fertile stems are photosynthetic. The nutrients produced feed the underground rhizome and allow it to survive through winter.

The green non-fertile stems are taking over from the pale fertile ones.

Horsetails incorporate silica in their cell structure, more than most vascular plants.

The stem segments make it look like a horse's tail.

Around a central cavity, the stem is segmented with whorls of fleshy, needle-like leaves at each junction. This makes it look much like the structure of a horse's tail.

Stages of growth: Fertile stems, emerging non-fertile and maturing Horsetails.

Young Horsetail shoots were used in traditional Japanese and First Nation cultures. There are some applications in modern times, but caution must be taken. Do you have a favourite plant from the forest or fields? Tell us about it. -- Margy

Thursday, May 7, 2020

Quarantine Cuisine: Restaurant Style Cheese Enchiladas with Green Sauce


Restaurant style cheese enchiladas with green sauce.
I have a limited repertoire for home cooked dinners. Up at the float cabin, Wayne cranks up the BBQ almost every night in all seasons. My job is to fix salads and sides.

With stay-at-home orders to protect against the Coronavirus, I've had to plan entrees to go with my sides.

We usually walk to the La Gloria Mexican food restaurant here in Bellingham. Wayne gets the cheese enchiladas with green sauce so I decided to make some while we are still waiting to go out to eat.

Cheese Enchiladas with Green Sauce

I've made enchilada's before, but during baking the tortillas get hard on the edges and soggy in the middle. I went online to find a recipe for restaurant style cheese enchiladas. I chose to use Jessica Fisher's recipe for Easiest Cheese Enchiladas on Good Cheap Eats.

Assembly line ready to go.
Ingredients for 24 Enchiladas:

oil for frying the tortillas
2 dozen corn tortillas
3 1/2 cup enchilada sauce (red or green)
20 oz cheddar cheese (shredded) can also use jack
1/4 cup sliced black olives (optional)
2 green onions chopped (optional)

Instructions:

This recipe is easy to scale up and down. I chose to make 15 enchiladas to have five for dinner, and two sets of five to freeze.

Lightly fried tortilla with cheese filling.
Grease two 9×13-inch baking dishes. Preheat the oven to 350 degrees F.

Heat one inch of oil in a small frying pan. Fry tortillas for a few seconds on each side in hot oil until they are pliable. Drain on paper towels. I fried the tortillas one at a time and let them cool slightly before filling and rolling.

I used a 28 oz. can of La Victoria Mild Green Enchilada Sauce. Put a small amount of enchilada sauce on the bottom of each dish.

Spooning sauce on rolled enchiladas.
Reserve 2 cups of cheese for the topping.

Place a small handful of cheese down the center of each tortilla, roll and place seam side down in the baking dish. When the dish is full, spoon sauce to cover the top of the rolled enchiladas.

Sprinkle the remaining cheese over top. If desired, add sliced olives and chopped green onions. I chose not to.

Bake in a 350 degrees F oven for 20 minutes or until heated through, bubbling and the cheese topping is melted.

Ready to bake, one with cheese topping for tonight's dinner.

I didn't put cheese on top of the enchiladas that were going into the freezer. I'll do that when they are reheated. You can freeze the extras either cooked or uncooked.

Wayne said these were the best enchiladas I've ever made. Thanks Jessica for the inspiration. -- Margy

Sunday, May 3, 2020

"Fire, Fog and Water" by Mike Martin


Fog, Fire and Water is the eighth book in Mike Martin's Sgt. Windflower Mystery series.

Mike Martin is a Canadian author originally from Newfoundland and now living in Ottawa, Ontario. You can take the man off "The Rock" but you can't take it out of him.

There are eight books in the Sgt. Windflower Mystery series. All are set in the normally quiet town of Grand Bank on the Burin Peninsula 357 km (by a circuitous route) east of the provincial capital St. John's.

And now for the book review: Sgt. Winston Windflower is the Royal Canadian Mounted Police Commanding Officer of the Grand Bank RCMP Detachment. Windflower walks his collie Lady several times a day, keeping an eye on things even beyond his duty hours.

One morning while running down the lookout trail he slips, slides down the slope and right into to a frozen body wrapped in rug. The ensuring investigation links to a women injured during a hit-and-run, a house fire, and discovery of opioid drugs in an abandoned mobile home. Meanwhile, difficulties within the RCMP organization add to the complexities of Mountie life. That's all I'll say. You'll have to read Fire, Fog and Water for yourself to see how Sgt. Windflower "gets his man" and then some.

I really like how Mike Martin's mystery books give you an up close look at life in a small Newfoundland town, including its police department. He uses local vernacular in the dialogue, and includes names like Sobey's (a grocery store) that takes me back to our vacations in the Newfloundland/Labrador province.  You can read any of the eight Sgt. Windflower Mystery books as a stand-alone, but I've liked reading the series in order to learn more about the backstory that keeps emerging.

Other reviews I've written for Mike Martin's Sgt. Windflower Mystery series.

A Tangled Web - Book 6 in the Sgt. Windflower Mystery Series

A case about a missing five-year-old child quickly expands like the interconnected threads of a spider's web throughout the small community of Grand Bank, Newfoundland and Nova Scotia. Follow the link to the review and pictures from the trips Wayne and I took to Newfoundland in 2009 and 2014.

Darkest Before the Dawn - Book 7 in the Windflower Mystery Series

A series of break-ins has the people of Grand Bank unnerved, then circumstances escalate and the situation quickly evolves into a murder mystery. Follow the link about to the review and a YouTube video and Google tour through the real Grand Bank.

You can find out more about Mike Martin at:

Mike Martin on Crime Writers of Canada
Mike Martin on Twitter
Mike Martin's Author Page on Amazon
Mike Martin on !ndigo
Sgt. Windflower Mystery Series on Facebook
Mike Martin book reviews on the Crafty Gardener blog

Fire, Fog and Water is available in print and ebook formats. Online options include Amazon.com, Amazon.ca and !ndigo/Chapters. -- Margy